TL;DR

Get school and study supplies delivered free — and shop member deals
- Fast, free delivery on millions of items
- Access to Prime Big Deal Days deals on October 6–7
- Prime Video, Amazon Music and more included
Science experiment kits for kids turn ideas in chemistry, physics, biology, engineering, and earth science into hands-on activities, but a kit alone does not guarantee learning. Choose one that fits your child’s interests and abilities, read its safety instructions before starting, and encourage them to predict, observe, and explain what happens.
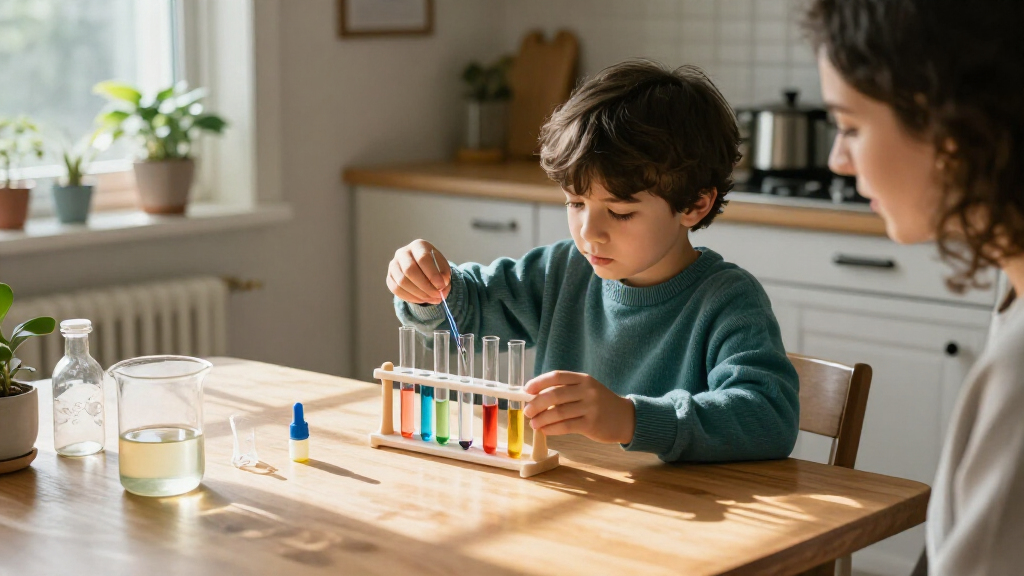
A fizzing cup can hold a better science lesson than a page of definitions—if your child gets to ask why it fizzed. Science experiment kits for kids put materials, directions, and a starting point for exploration in one box. They can bring an abstract idea onto the kitchen table, where a child can see, touch, and talk about what happens.
But a bright package does not tell you whether the activities suit your child, whether the kit needs an adult nearby, or whether you need to buy refills. This guide explains what kits can teach, how to compare them, what to check for safety, and how to turn a step-by-step activity into a real investigation. You’ll also find ways to choose between physical-only and digital features without mistaking marketing claims for proof of quality.
The goal isn’t to make every afternoon a classroom. It’s to find a project your child wants to try, then leave room for the most useful question of all: “What do you think will happen if we change this?”
Choose a kit around your child’s interests, ability to follow its directions, and the amount of adult supervision it needs.
Before purchase, check activity count, included materials, possible refills, and whether digital lessons require a device, account, or subscription.
Read safety instructions before opening the box; follow the stated equipment, supervision, storage, and cleanup guidance.
To encourage investigation, ask your child to predict, observe, change one factor at a time, and explain what happened.
For siblings, check whether the supplies support group use and share roles such as builder, tester, and observer.
What a science kit can teach beyond following directions
Science experiment kits for kids are boxed activities that use materials and instructions to help children explore ideas in subjects such as chemistry, physics, biology, engineering, and earth science. A kit might include tools, several projects, and an instruction booklet that explains what to do and what to watch for. The best activities give children a chance to test an idea, not just copy a recipe.
That difference matters because completing a set of steps is not the same as understanding why they work. A child following directions to grow crystals may enjoy the sparkly result, but may not notice the conditions that shaped it. Invite them to predict what might happen in a warmer or cooler spot, then compare the results. The materials become evidence to think about, rather than props for reaching a prize.
Kits can make abstract ideas concrete. A paper bridge challenge, for example, lets a child see how folding changes how much weight a sheet holds. That observation can lead to a broader idea—that a structure’s shape affects how it handles a load—without requiring the child to memorize a technical term first. Simple habits build on one another: ask a question, make a prediction, observe carefully, and explain the result in your own words.
A kit does not guarantee a particular learning outcome. Its value depends on the activity, the child’s interest, and how the experiment is used. Some children may be satisfied with making the project work; others will want to repeat it or change a condition. Either response can be a starting point. If a child rushes toward the finished product, pause to ask, “What changed between your first and second test?” That small shift can turn an activity into a chance to notice patterns and think about cause and effect.
science experiment kits for kids age 8
As an affiliate, we earn on qualifying purchases.
As an affiliate, we earn on qualifying purchases.
How to choose a kit your child will actually use
Choose a kit by matching its subject, difficulty, and supervision needs to the child who will open the box. Start with what already catches their attention: a child who collects stones may be keen on earth science, while a kid who loves building towers may prefer engineering. Interest matters because it helps a child persist when an experiment takes time or the first attempt doesn’t work. An appealing theme can make the difference between a box that sits on a shelf and one that gets opened on a rainy Saturday.
- Check the age guidance. Treat the label as a useful screening tool, not a full measure of fit. Reading level, patience, small parts, and the amount of adult help required can matter just as much as age. A child may be ready to understand an idea but still need help completing the steps safely.
- Read the activity steps. Look for clear directions and explanations of what children should observe, rather than a sequence that tells them only what to mix or assemble. If the directions are hard for an adult to follow, a child may end up waiting for help instead of taking an active role.
- Count the experiments and supplies. Check whether the kit includes materials for several activities and whether you’ll need household items, replacements, or refills. A box promising many experiments may rely on the same limited supplies, so consider how many activities your child can actually complete before anything runs out.
- Review safety and cleanup instructions. Find the stated supervision, protective equipment, storage, ventilation, and disposal guidance before buying. These details help you judge whether the project fits your space and routine, not just whether you can manage it once the experiment is underway.
- Look for room to investigate. Prefer activities where children can compare results or ask a follow-up question, not only produce a finished object. That flexibility can make a kit useful beyond its printed steps, as long as any changes remain within the instructions’ safety limits.
For example, if your eight-year-old enjoys insects but struggles with long instructions, a kit with a few short observation activities may fit better than a complex project marked for older children. The right match isn’t the fanciest box. It’s the one that makes your child want to begin and gives them a manageable role, while leaving you with a realistic amount of supervision.
When possible, scan the instruction booklet or product details before purchase. Clear information about included materials and adult involvement helps you plan: you don’t want to discover at 7 p.m. that the “complete” activity depends on a tool you don’t have. This quick check also exposes tradeoffs: a kit with more ambitious projects may offer greater challenge, but could require more setup, adult time, or repeat purchases than your family wants.
How to turn one activity into a real investigation
A kit becomes more engaging when your child predicts, observes, and compares instead of racing from one instruction to the next. You don’t need a lab coat or a long lesson. A few minutes of conversation can help connect the activity to the idea behind it, while letting the child stay in charge of the discovery. The point is not to make every result prove a theory; it is to help children notice what happened and distinguish an observation from a guess.
- Start with a question. Ask something the activity can help answer, such as “Which paper shape will hold more coins?” A focused question gives the experiment a purpose and makes it easier to decide what to observe.
- Make a prediction. Invite your child to say what they think will happen and why. There is no need to guess correctly; explaining a prediction gives them something to compare with the result.
- Try the activity as directed. Follow the steps and record what you see, hear, or measure. A simple count or drawing can help children remember details that might otherwise blur together.
- Change one factor. For the paper bridge, try a flat sheet and then a folded one while keeping the coin size and placement the same. Holding other conditions steady makes it easier to connect a difference in the result to the change being tested.
- Explain the result. Ask what surprised them and what they might test next. If the result differs from the prediction, treat that as useful information rather than a mistake.
Imagine a child building two bridges from the same paper. The flat bridge sags after three coins, while the folded bridge holds six. Rather than immediately giving the answer, ask what the fold may have changed. That pause gives the child a chance to connect the visible shape to the result—and to recognize that an experiment can help answer a question without explaining every detail at once.
This approach works for many subjects: compare how seeds grow under different light conditions, or test how far a toy car rolls down ramps of different heights, if the kit’s instructions allow those variations. Change only one factor at a time so the comparison stays understandable. If several things change at once, it becomes harder to tell what caused the different result. Follow the kit’s directions, and don’t improvise with materials or steps unless a responsible adult has checked that it’s safe.
How to check safety before the box hits the table
Read the product instructions and warnings before starting, then follow the stated supervision and protective measures. A product being marketed to children does not mean every activity is suitable for every child without adult help. Age guidance, small-parts warnings, and directions for handling materials all matter because the same activity can pose different challenges depending on a child’s age, behavior, and ability to follow steps.
Before an activity, check which equipment it calls for, where it should take place, and how to clean up afterward. Keep experiments away from food and drink, and keep small parts or chemicals out of reach of children who may put them in their mouths. Use only the materials specified in the instructions. Do not mix substances or add household ingredients just to see what happens: changing a recipe can create an outcome the kit’s directions and safeguards were not designed to address.
For instance, if a kit calls for eye protection, get it ready before opening the materials; don’t wait until an activity is underway. If directions specify ventilation or a particular disposal method, follow them rather than guessing. These instructions are part of how the activity is meant to be used, not optional fine print. Store leftover materials as the product directs, and make sure everyone knows which items are part of the experiment and which belong back in the box.
Practical rule: Review the instructions first, supervise as directed, and stop if you can’t follow the kit’s safety guidance.
If an exposure or injury happens, follow the product’s emergency instructions and contact local poison control or emergency services as appropriate. Safety steps do not need to drain the fun from an experiment. Preparing in advance reduces interruptions and uncertainty, making it easier for everyone to focus on the bubbling cup, the tiny seedling, or the bridge that held one more coin than expected.
What digital extras and refill claims really mean
Digital features and refill packs can add convenience, but they do not prove a kit is better. Some recent kits pair physical supplies with QR codes, videos, apps, or online lessons. Others blend hands-on activities with coding, robotics, or engineering challenges. These are market trends, not guarantees of clear instructions, strong activities, or sound safety guidance. Judge the experiment itself first: a digital layer is helpful only if it makes an activity easier to understand or adds something the physical materials cannot provide.
A short video can help a child see how to assemble a model before trying it, which may reduce frustration if a picture or written step is unclear. But check whether the digital feature requires a phone, account, internet access, or paid subscription. Each requirement can add a practical hurdle, and a child who needs a device to proceed may have less independence. If your family prefers to keep devices off the table, a kit that depends on online lessons may create more friction than fun.
Refill packs and reusable tools also need a closer look. Measuring cups or magnifiers may serve many projects, while experiment materials may run out after one session. Ask whether replacement supplies are easy to find, and whether the activity can be repeated without buying another box. A low upfront price may be less economical if key consumables are difficult to replace; conversely, paying more for reusable tools is worthwhile only if your child is likely to use them again.
Sustainability claims vary, too. Look for concrete details about reusable components, packaging, or replacement materials instead of relying on a broad label. For example, a kit with a sturdy magnifier and several projects may see more use than one with a large pile of single-use packaging, but only if the child likes the subject and the activities fit your household. Reusability is a potential advantage, not a benefit if the tools sit unused.
Think of digital and refill features as practical tradeoffs. A QR code may add a useful demonstration; it may also add screen time or a connection requirement. A reusable tool may stretch a kit’s life; it cannot rescue directions that confuse the child. Compare the details with how your family actually likes to learn and play, and weigh ongoing costs and setup against the value the feature provides.
How to make a kit work for siblings and busy families
A kit can work for more than one child when you check the amount of material and give each child a way to take part. The package may contain enough supplies for one person at a time, or it may support a small group. Don’t assume: look at what is included and whether the activity is repeated individually or shared. This matters because scarce materials can turn a cooperative project into a waiting game, while a shared experiment can also make comparison and discussion easier.
Picture two siblings building a paper bridge. One can fold and assemble while the other places coins and records the count; then they can switch roles for the next test. That keeps both children involved without requiring duplicate kits. For activities with limited materials, taking turns can still create a useful comparison, as long as everyone can see the results and gets a chance to participate. Giving each child a different role also helps prevent the older or more confident sibling from taking over.
If time is tight, prepare the table before inviting children over. Read the instructions, gather only the specified supplies, and set out a tray for cleanup. A short activity with a clear stopping point may fit after school better than a project that needs hours of waiting or several rounds of setup. Planning for the full activity—including waiting and cleanup—helps avoid having to rush a step or leave materials unattended.
For younger children, an adult may need to handle steps that the directions reserve for adults. Older children can often take more responsibility, but the product’s instructions still set the boundaries. A shared project also gives you a natural way to ask questions without turning the evening into a quiz: “What did you notice?” is often better than “What’s the right answer?” It invites each child to contribute an observation, even if they were not the one handling the materials.
When a child wants to repeat an activity, repetition can be useful rather than boring. They can check whether the result happens again, try a different allowed condition, or explain the steps to a sibling. Repeating a test also helps children notice whether a result is consistent, although small differences can happen. A kit’s best family moment may be less about a perfect result and more about the lively argument over whose bridge was stronger—and why.
Frequently Asked Questions
What age are science kits suitable for?
It depends on the kit and the child. Follow the manufacturer’s age guidance, then check the reading level, small-parts warnings, and required adult supervision. A child may enjoy the subject while still needing help with the instructions.
Are science experiment kits safe for kids?
They can be appropriate when children use them exactly as directed and follow the stated safety measures. Review the warnings and instructions before starting, use only specified materials, and supervise as directed. Don’t assume a children’s label means every activity needs no adult help.
Do children need an adult to help?
Many kits call for adult supervision, especially for younger children or activities with small parts, chemicals, sharp tools, or heat. Check the product instructions for the exact requirements. An adult can also help children discuss what they observe without taking over the experiment.
What should I look for in a good science kit?
Look for clear instructions, activities suited to the child’s interests and abilities, visible safety guidance, and details about included materials and refills. Kits are more engaging when children can predict, compare results, or ask follow-up questions rather than only follow a recipe.
Are science experiment kits educational or just entertainment?
They can support learning when children make predictions, observe results, compare what happened, and talk through their ideas. A kit does not guarantee a particular outcome; the quality of its activities and how the child uses it both matter. Asking “What changed in your second test?” can make a playful activity more thoughtful.
Do digital science kits need a subscription or internet access?
Some kits use online videos, apps, or lessons, while others work without a device. Check the product information for account, connectivity, and subscription requirements before buying. A useful video may add guidance, but a screen-dependent kit may not suit every family.
Conclusion
Choose the kit your child is curious enough to open, then give them room to question what happens. Check the directions and safety guidance first, match the activities to their abilities, and don’t expect a box alone to do the teaching. One careful prediction or surprising result can be enough to get a child thinking.
When the table is clear and the last measuring cup is dry, the experiment can keep going in your child’s imagination: one small question, glowing like a seed under a jar, waiting for the next test.
Halloween Picks
halloween
As an affiliate, we earn on qualifying purchases.